By PAUL F. GERO - The Wedding Photojournalist Association
Recently there is no topic that creates as much impassioned conversation when it is discussed among photographers. In the current Wedding Bells magazine, there is an article that describes the total digital transformation of three photographers including Monte Zucker (the famous portraitist), Jeff Hawkins (a Florida photographer) and Denis Reggie (who many would consider the father of documentary wedding photography).
There are impassioned supporters of both film and digital. As a photographer who has used film for over twenty years and digital for the last six years, I would have to say that, at the time of this writing, it’s just about a dead heat.
At least fairly recently (the last two years and especially this past year), film did surpass the quality of digital capture, in my opinion. Film does still handle certain situations better than does digital, but for all practical purposes, they will both produce professional results IN THE HANDS OF A PROFESSIONAL.
Some of these professionals are 100 % digital (i.e. David Beckstead or Denis Reggie) while others still prefer film only or a combination of the two. (I still like to shoot a little 3200 Kodak Tmax for the look it gives).
Digital, though, is revolutionizing the photographic industry in a way that has been nothing short of astounding. It is here in the present and will be down the road. And like computers, it will only get better, faster and cheaper (at least the cost of the tools).
When researching a photographer who shoots digitally it is important to discern if that photographer is relatively new to the technology or has been using it for a longer period of time (and thus should have the bugs worked out).
Examine photographs made by the photographer using digital capture. Most likely, that photographer will have work that was also captured with film. Compare them and see if you can tell the difference.
When I discuss digital vs. film with prospective couples these days, I find much less resistance than I did a year ago. Couples are usually pretty technologically savvy and often follow the developments in our industry, at least on the periphery.
Any opposition some might have to digital goes away when I show them images that are captured on digital (on a Canon 1d - 4.1 megapixel chip camera) that are quite large (14” x 22” full bleed in an 11 x 14 inch album) .
They also see many images that have been captured on film, though scanned. Some folks are able to notice the differences, but most really don’t care.
What they care about are the images and the feelings that they capture and evoke. That’s really what it comes down to and the main reason we are hired.
Digital does, though, offer several advantages to the photographers while working.
1) The ability to see the image right away. This is my favorite reason for using digital capture. It gives me a level of comfort because I can see if my lighting, expression, exposure, etc. are correct right away rather than wait to see the film back from the lab in a few days.
2) The ability to change the ISO ( or the equivalent of film speed) on the fly. This allows the photographer to go in and out of a myriad of lighting situations without having to suddenly change film to match the light levels from place to place at a wedding.
3) A virtually unlimited number of photographs can be captured at an event. This can be the boon and the bane of the photographers’ existence, though, because if you shoot them, you've got to edit them. But it frees the photographer from thinking “I can only shoot 10, 12 or whatever number of rolls of film at this event in order to keep it within budget.”
4) The ability to make black and white and sepia toned photographs from the digital capture. When one shoots digitally (unless they are capturied in a black and white only mode on the Fuji S2) every photograph can become a black and white and/or sepia image. Parents may want an image in color, the couple may want to have it in black and white.
5) Digital workflow. Many photographers now offer what is often called a magazine style (or flush mounted) album. Images shot on film would have to be scanned in order to produce this type of album. While it is totally doable, it adds time and another step in the process. Digital capture elimnates the scanning and often the time spent dust spotting the scan made from negatives. (Though I know of a very talented photographer -- George Weir, who is a WEDDING PHOTOJOURNALIST ASSOCIATION member -- who prefers film and has his images scanned to disk to allow him to still post images online and then create images for his lab. He has created a digital workflow without using digital capture and is very pleased with the results).
6) Freedom to experiment. This is a corollary to reason one. I will often shoot images that I would not even try with film because I know I will be able to erase it if it doesn’t work and modify it because I’ll be seeing the results immediately. I was on a foreign trip last year and stuck in the bus on a rainy day. I literally pointed the camera out the window and just made some exposures just for the fun of it. And it was fun! Some of those images were totally unexpected and I would not have “wasted” film on it. But because I had the immediate feedback I could see what was working, modify it as I shot and make some different images.
Despite all the buzz about film vs. digital what it gets right down to when selecting a photographer are the images and personality.
Do you like the feel and the style of the images that the photographer shows? Do you LIKE the photographer? Do you trust him or her? Do they exude confidence about the work they do and the tools that they use? Do they have raving fans who will share testimonials with you?
© 2003 The Wedding Photojournalist Association

Custom Search
Selasa, 26 Agustus 2008
Kamis, 14 Agustus 2008
Humor in photography
Fun & unusual pictures
People are always doing funny things, often where you least expect them. Being ready to capture them on film means you won't have your friends looking skeptically at you when you describe the scene. A picture can tell the story for you.

Put a kitten and a teen-ager together, and anything can happen,
although the kitten seems to think it's business as usual.
Hmm, when you're a feline (or a teenager), it probably is.
You may set up your own funny situation and take a picture of it. It can provide a lot of laughs when you do so, and even more laughter afterwards when everyone looks at the pictures.
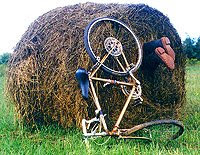
This is either a cyclist who was going fast, completely out
of control, or the creation of a farmer with a good sense of humor.
This section of photographytips.com features a selection of images from both areas - "found" humorous pictures and staged pictures that were set up to be funny.

Theatrical expression adds to the creativity and humor.
We hope you enjoy them, and they inspire you to either become creative in making your own fun pictures, or to keep your eyes peeled for humorous situations around you.
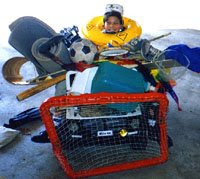
When a neighbor's kid asks if he can borrow something
from your garage, use a camera to record everything he borrows.
Selasa, 12 Agustus 2008
Worst 5 Camera Buying Mistakes
What Not to Do When Shopping for a Digital Camera
By Michael Carr, About.com
You may know what megapixels and zoom lenses are, but do you know what not to do when shopping for a digital camera? Here are the worst digital camera shopping mistakes.
1. Buying a Digital Camera Without Using it First
This is probably a fairly common mistake, but easily the worst. It's so easy to get caught up in reviews and specs and features and comparisons, and forget one essential fact. You need to like the camera. That means, even if you buy the camera online, you should first hit a local camera store and handle the camera. You want to be sure it's a powered, fully functional model (and it's the exact same model that interests you , not a "similar" one). Also don't be afraid to asks a salesperson to take it off the tethers if that interferes with your ability to handle it. Pretend you're taking pictures. See how it feels in your hand. Try to do specific tasks, and see how hard the camera controls are to navigate.
Digital Camera Buyer's Guide
2. Buying the Most Expensive Digital Camera You Can Afford
It can be tempting to get the coolest, slickest, most high-end camera you can afford. That doesn't mean you should. For example, if you're new to photography you won't want an advanced digital SLR with lots of manual controls. If you're just looking to take pictures for your blog, you don't need 12 megapixels. There is no need to pay for features you won't use and, in fact, it will make using the camera more confusing and less pleasant. It's better to look within your budget, but focus on finding the best camera for your specific needs.
Digital Cameras by Price
3. Focusing Only on Digital Camera Megapixels
Megapixels are often the first thing people wonder about when considering a digital camera. Sure, you shouldn't ignore megapixels. It certainly shouldn't be your only consideration, and may not even be your primary consideration. In fact, if you have an older computer or you don't care to buy high-capacity memory cards, you will not want a 12 megapixel camera that will eat up storage space. Think beyond megapixels, because another feature (such as zoom) could be much more important for you.
How Many Megapixels Do You Really Need?
4. Being Wooed by Junk Digital Camera Zoom Numbers
If you need zoom, don't get fooled by inflated numbers based on digital zoom. Digital zoom is essentially useless. A salesman might give it a nice spin by saying something like, "You get a total zoom of 10x!" How much of that is optical? If it's just 3x optical, that is pretty much the standard zoom on digital cameras and nothing to get excited about. You always want to ask about the optical zoom rate. If you are used to film cameras, you should also ask about the 35mm equivalent so that you understand just what 5x optical zoom really means.
Optical Zoom vs. Digital Zoom
5. Not Knowing What You Want in a Digital Camera
There are an awful lot of digital camera features available, but you won't find many cameras that do everything well. It is better to understand the available features, and decide which features are the most important for you. Consider making a list of your three most important features, then rank them. That way, you can work on finding a camera that meets those needs first, and worry about extra features if they so happen to come in the camera you like.
Senin, 11 Agustus 2008
Bridge digital camera
From Wikipedia, the free encyclopedia
Bridge digital cameras are a type of high-end digital camera. They are comparable in size and weight to the smallest digital single-lens reflex cameras (DSLRs), but they lack the removable lenses, larger sensors,[1] mirror, and reflex system that characterize DSLRs. The term "bridge" characterizes the way in which these cameras fill the niche between the DSLRs and the compact digital cameras. Although bridge cameras are closely related to consumer compacts, they are sometimes confused with DSLRs due to their similar bodies and large zoom lenses. Almost all bridge digital cameras feature full manual controls over shutter-speed, aperture, ISO, white-balance and metering. Generally, their feature sets are similar to DSLRs, except for a smaller range of ISO sensitivities due to their smaller sensors (a DSLR has a 35mm, APS, or 4/3 size CCD or CMOS) and less expandability options (such as interchangeable lenses, battery grips, and wireless flash options).
One fixed but versatile lens

An example of a superzoom bridge camera, the Panasonic Lumix DMC-FZ30
Because bridge cameras have small sensors, their lenses can also be smaller than DSLR lenses while providing comparable zoom abilities. As a result, very large zoom ranges (from wide-angle to telephoto, including macro) are feasible with one lens. The typical bridge camera has a telephoto zoom limit of over 400mm (35mm equivalent), although newer cameras reach over 500mm.[2] For this reason, bridge cameras typically fall into the category of superzoom cameras[3]. The ability to fit such a wide zoom range in one single small-diameter lens makes lens interchangeability redundant for most photographers. However, most bridge cameras allow the use of secondary lenses to improve wide angle, telephoto or macro capabilities. These secondary lenses typically screw onto the front of the primary lens either directly or by use of an adapter tube.
LCDs and EVFs as principal viewfinders
Bridge cameras employ two types of electronic screens as viewfinders: The LCD and the electronic viewfinder (EVF). All bridge cameras have an LCD with live-preview and usually in addition either an EVF or an optical viewfinder (OVF) (non-parallax-free, as opposed to the OVF of DSLRs, which is parallax-free). The existence of a high-quality EVF is one of the advanced features that distinguish bridge cameras from consumer compact cameras.
Electronic viewfinders (EVFs) vs DSLR reflex viewfinder comparison
Live-preview EVF advantages
Since in bridge camera there is no mirror that blocks the image formed by the objective lens from being projected over the sensor, as is the case with DSLRs, the LCD and EVF of bridge cameras continuously show the image generated by the sensor. This continuous digitally-generated live-preview has some advantages and disadvantages over the optically-generated view through the OVF of DSLRs. One advantage is that the digital preview is affected by all shooting settings and thus the image is seen as it will be recorded (in terms of things like exposure, white balance, grain-noise, etc) which the OVF of DSLRs is incapable of showing [4]. Another advantage is facilitating the framing from difficult angles by making the LCD movable (vari-angle). Also the LCD and EVF show 100% of the image while previewing (WYSIWYG), while the OVF of some DSLRs (especially entry level DSLRs) does not cover the full 100%.
Live-preview viewfinder disadvantages
,.jpg)
The Konica Minolta DIMAGE A200 (2005), the most sophisticated digital camera made by Konica Minolta before its fusion with Sony
The disadvantages however are that the electronic screens of bridge cameras do not work as well as the OVF of DSLRs in situations of low light (or in bright day-light with the LCD), where the screen might be difficult to see and use for framing. Also the screen is of low resolution and refresh rate compared to the very high resolution and instantaneous refresh provided by an optical path in the OVF of DSLRs. This low resolution makes it more difficult to focus manually. However, most modern bridge cameras
The Konica Minolta DIMAGE
A200 (2005)
implement a method that automatically magnifies a central frame within the screen (manual focus point) to allow easier manual focusing. A slow refresh rate means that the image seen on the screen will have a fraction of a second lag or delay from real scene being photographed. The electronic screens used in modern bridge cameras are gradually improving in their size, resolution, visibility, magnification and refresh rate.
Another disadvantage is battery life. A DSLR's sensor is not operating unless the shutter is open, and the electronic screen is typically off more, causing less battery drain.
LCD and EVF of bridge cameras continuously showing the image generated by the sensor causes superheating of the sensor increasing digital noise; in DSLR sensor is exposed to the light only for the time strictly necessary for the shot.
Examples of bridge cameras
Current examples of bridge cameras are the Canon PowerShot S5 IS, Fujifilm FinePix S100fs, Olympus SP-570UZ, and the Panasonic Lumix DMC-FZ50. The upcoming Casio Exilim Pro EX-F1 could also be considered a bridge camera, though its video features distinguish it from any other consumer camera. Kodak also produces a line of super-zoom cameras, though these do not have essential DSLR features such as the ability to use an external flash (with the exception of the EasyShare P-Series). Nikon currently manufactures the Coolpix P80, which is an 18x superzoom, but lacks the external flash capability of other bridge cameras. Minolta (before the Konica Minolta merger) marketed the DiMAGE series, with the Minolta GT manual fixed zoom lens. Their bridge digital cameras were known as ZSLRs (zoom lens, single lens reflex).
Exceptions
The Sony DSC-R1
Some cameras may share several bridge camera features, but differ for
some significan t reason. For example, the Sony DSC-R1 (2005-2006) and the Sigma DP1 (2008) have non-interchangeable lenses and no mirror/reflex systems, but they have APS size imaging sensors. The DP1 is also much smaller than typical bridge cameras, and has a fixed focal length (non-zoom) lens. Digital rangefinders like the Leica M8 and the Epson R-D1 have no mirror/reflex systems, but do have interchangeable lenses and large imaging sensors; while these cameras are not DSLRs, they are very expensive and occupy a very different niche than do bridge cameras.
The Sony DSC-R1
Bridge digital cameras are a type of high-end digital camera. They are comparable in size and weight to the smallest digital single-lens reflex cameras (DSLRs), but they lack the removable lenses, larger sensors,[1] mirror, and reflex system that characterize DSLRs. The term "bridge" characterizes the way in which these cameras fill the niche between the DSLRs and the compact digital cameras. Although bridge cameras are closely related to consumer compacts, they are sometimes confused with DSLRs due to their similar bodies and large zoom lenses. Almost all bridge digital cameras feature full manual controls over shutter-speed, aperture, ISO, white-balance and metering. Generally, their feature sets are similar to DSLRs, except for a smaller range of ISO sensitivities due to their smaller sensors (a DSLR has a 35mm, APS, or 4/3 size CCD or CMOS) and less expandability options (such as interchangeable lenses, battery grips, and wireless flash options).
One fixed but versatile lens

An example of a superzoom bridge camera, the Panasonic Lumix DMC-FZ30
Because bridge cameras have small sensors, their lenses can also be smaller than DSLR lenses while providing comparable zoom abilities. As a result, very large zoom ranges (from wide-angle to telephoto, including macro) are feasible with one lens. The typical bridge camera has a telephoto zoom limit of over 400mm (35mm equivalent), although newer cameras reach over 500mm.[2] For this reason, bridge cameras typically fall into the category of superzoom cameras[3]. The ability to fit such a wide zoom range in one single small-diameter lens makes lens interchangeability redundant for most photographers. However, most bridge cameras allow the use of secondary lenses to improve wide angle, telephoto or macro capabilities. These secondary lenses typically screw onto the front of the primary lens either directly or by use of an adapter tube.
LCDs and EVFs as principal viewfinders
Bridge cameras employ two types of electronic screens as viewfinders: The LCD and the electronic viewfinder (EVF). All bridge cameras have an LCD with live-preview and usually in addition either an EVF or an optical viewfinder (OVF) (non-parallax-free, as opposed to the OVF of DSLRs, which is parallax-free). The existence of a high-quality EVF is one of the advanced features that distinguish bridge cameras from consumer compact cameras.
Electronic viewfinders (EVFs) vs DSLR reflex viewfinder comparison
Live-preview EVF advantages
Since in bridge camera there is no mirror that blocks the image formed by the objective lens from being projected over the sensor, as is the case with DSLRs, the LCD and EVF of bridge cameras continuously show the image generated by the sensor. This continuous digitally-generated live-preview has some advantages and disadvantages over the optically-generated view through the OVF of DSLRs. One advantage is that the digital preview is affected by all shooting settings and thus the image is seen as it will be recorded (in terms of things like exposure, white balance, grain-noise, etc) which the OVF of DSLRs is incapable of showing [4]. Another advantage is facilitating the framing from difficult angles by making the LCD movable (vari-angle). Also the LCD and EVF show 100% of the image while previewing (WYSIWYG), while the OVF of some DSLRs (especially entry level DSLRs) does not cover the full 100%.
Live-preview viewfinder disadvantages
,.jpg)
The Konica Minolta DIMAGE A200 (2005), the most sophisticated digital camera made by Konica Minolta before its fusion with Sony
The disadvantages however are that the electronic screens of bridge cameras do not work as well as the OVF of DSLRs in situations of low light (or in bright day-light with the LCD), where the screen might be difficult to see and use for framing. Also the screen is of low resolution and refresh rate compared to the very high resolution and instantaneous refresh provided by an optical path in the OVF of DSLRs. This low resolution makes it more difficult to focus manually. However, most modern bridge cameras
The Konica Minolta DIMAGE
A200 (2005)
implement a method that automatically magnifies a central frame within the screen (manual focus point) to allow easier manual focusing. A slow refresh rate means that the image seen on the screen will have a fraction of a second lag or delay from real scene being photographed. The electronic screens used in modern bridge cameras are gradually improving in their size, resolution, visibility, magnification and refresh rate.
Another disadvantage is battery life. A DSLR's sensor is not operating unless the shutter is open, and the electronic screen is typically off more, causing less battery drain.
LCD and EVF of bridge cameras continuously showing the image generated by the sensor causes superheating of the sensor increasing digital noise; in DSLR sensor is exposed to the light only for the time strictly necessary for the shot.
Examples of bridge cameras
Current examples of bridge cameras are the Canon PowerShot S5 IS, Fujifilm FinePix S100fs, Olympus SP-570UZ, and the Panasonic Lumix DMC-FZ50. The upcoming Casio Exilim Pro EX-F1 could also be considered a bridge camera, though its video features distinguish it from any other consumer camera. Kodak also produces a line of super-zoom cameras, though these do not have essential DSLR features such as the ability to use an external flash (with the exception of the EasyShare P-Series). Nikon currently manufactures the Coolpix P80, which is an 18x superzoom, but lacks the external flash capability of other bridge cameras. Minolta (before the Konica Minolta merger) marketed the DiMAGE series, with the Minolta GT manual fixed zoom lens. Their bridge digital cameras were known as ZSLRs (zoom lens, single lens reflex).
Exceptions
The Sony DSC-R1
Some cameras may share several bridge camera features, but differ for
some significan
 t reason. For example, the Sony DSC-R1 (2005-2006) and the Sigma DP1 (2008) have non-interchangeable lenses and no mirror/reflex systems, but they have APS size imaging sensors. The DP1 is also much smaller than typical bridge cameras, and has a fixed focal length (non-zoom) lens. Digital rangefinders like the Leica M8 and the Epson R-D1 have no mirror/reflex systems, but do have interchangeable lenses and large imaging sensors; while these cameras are not DSLRs, they are very expensive and occupy a very different niche than do bridge cameras.
The Sony DSC-R1
Kamis, 07 Agustus 2008
Five Simple Steps to Better Product Photography
1) In order to ensure your images are sharp, make sure you know how to focus your camera. Digital cameras with auto focus are often difficult to focus precisely, especially when shooting small objects. Read your owner's manual and be sure you understand how your camera's auto focus operates. Most digital cameras are designed to easily focus on large objects but have difficulty on small subjects. It is often useful to put your camera in spot focus mode. Spot focus will give you more control over what part of a scene the camera is actually focusing on.
2) Use a tripod, even the slightest movement while taking a picture will cause motion blur. The closer you get to an object the more obvious the motion blur becomes. Even an inexpensive tripod will make a big difference in the sharpness of your images. For really sharp images it makes sense to invest in a good, sturdy tripod. If your camera has a remote shutter release then use it, if not then use the camera's built-in timer to minimize camera shake.
3) To get the largest area of your subject in focus put your camera in aperture priority mode and set the aperture to the highest number possible. The closer you get to your subject the more important this becomes.
4) Use soft lighting. Your camera's built-in flash will rarely give good results for product photography. For soft lighting either shoot outside on an overcast day or use a light tent like the EZcube®, or use a soft box.
5) Use image editing software. Even inexpensive software like Photoshop Elements™ can make your product photography much easier. It may seem like it's faster to use an image exactly as it was shot. But in reality, it is difficult to shoot an image precisely how you would like it to appear in it's final form. Image editing software allows you to crop an image, adjust it's exposure, sharpen the image and then resize it, often in less than 60 seconds.
The biggest difference between an amateur's product snapshot and a professional's product image are sharpness and lighting. Steps 1,2, and 3, will improve the sharpness of your images while Step 4 will improve your lighting. A minute spent editing an image will improve it further. Because these few steps seem so basic, it's tempting to ignore them. However, if you take the time to follow them, you will see a huge improvement in the quality of your images.
Selasa, 05 Agustus 2008
What the PJ Style is / Wedding Photojournalism
By GEORGE WEIR- The Wedding Photojournalist Association
There are probably at least twice as many definitions of “What The PJ Style Is” as there are photographers practicing it. When asked 'what is photojournalism'? W. Eugene Smith, one of the 20th century’s greatest photojournalists, replied “Documentary Photography with a purpose”.
For me the single most important element of the PJ Style is meeting and exceeding the client’s wishes, desires and taste with my own documentary style. Beyond delivering technical excellence the photographer’s eye and brain must be able to anticipate and recognize not only the physical actions and emotions but also the geometric shapes, lighting and composition that come together to reveal seemingly simple but complex images. It is the photographer’s assignment to record these moments and produce images that will warrant many second looks over many years.
PJ Style should be a cohesive collection of images that are not only a record of the day’s events but are also images that capture as many “decisive moments” as possible. The resultant images should be able to stand the test of time and look as fresh and vital in thirty or more years as they did when first viewed.
© 2003 The Wedding Photojournalist Association
Photojournalism
From Wikipedia, the free encyclopedia
Photojournalism is a particular form of journalism (the collecting, editing, and presenting of news material for publication or broadcast) that creates images in order to tell a news story. It is now usually understood to refer only to still images, and in some cases to video used in broadcast journalism. Photojournalism is distinguished from other close branches of photography (such as documentary photography, street photography or celebrity photography) by the qualities of:
- Timeliness — the images have meaning in the context of a recently published record of events.
- Objectivity — the situation implied by the images is a fair and accurate representation of the events they depict in both content and tone.
- Narrative — the images combine with other news elements to make facts relatable to the viewer or reader on a cultural level.
Like a writer, a photojournalist is a reporter but he or she must often make decisions instantly and carry photographic equipment, often while exposed to significant obstacles (physical danger, weather, crowds).
HISTORY
Foundations
The practice of illustrating news stories with photographs was made possible by printing and photography innovations that occurred between 1880 and 1897. While newsworthy events were photographed as early as the 1850s, printing presses could only publish from engravings until the 1880s. Early news photographs required that photos be re-interpreted by an engraver before they could be published.
The first photojournalist was Carol Szathmari who did pictures in the Crimean War(1853 to 1856). His albums were sent to European royals houses[citation needed]. Just a few of his photography survived. The next ones were British press reporters,in the same war. William Simpson of the Illustrated London News and Roger Fenton were published as engravings. Similarly, the American Civil War photographs of Mathew Brady were engraved before publication in Harper's Weekly. Because the public craved more realistic representations of news stories, it was common for newsworthy photographs to be exhibited in galleries or to be copied photographically in limited numbers.
On March 4, 1880, The Daily Graphic (New York) [1] published the first halftone (rather than engraved) reproduction of a news photograph. Further innovations followed. In 1887, flash powder was invented, enabling journalists such as Jacob Riis to photograph informal subjects indoors, which led to the landmark work How the Other Half Lives[2]. By 1897, it became possible to reproduce halftone photographs on printing presses running at full speed.[3]
Despite these innovations, limitations remained, and many of the sensational newspaper and magazine stories in the period from 1897 to 1927 (see Yellow Journalism) were illustrated with engravings. In 1921, the wirephoto made it possible to transmit pictures almost as quickly as news itself could travel. However, it was not until development of the commercial 35mm Leica camera in 1925, and the first flash bulbs between 1927 and 1930 that all the elements were in place for a "golden age" of photojournalism.
Golden age
In the "golden age" of photojournalism (1930s–1950s), some magazines (Picture Post (London), Paris Match (Paris), Arbeiter-Illustrierte-Zeitung (Berlin), Berliner Illustrierte Zeitung (Berlin), Life (USA), Sports Illustrated (USA)) and newspapers (The Daily Mirror (London), The New York Daily News (New York)) built their huge readerships and reputations largely on their use of photography, and photographers such as Robert Capa, Alfred Eisenstaedt, Margaret Bourke-White and W. Eugene Smith became well-known names.
Henri Cartier-Bresson is held by some to be the father of modern photojournalism, although this appellation has been applied to various other photographers, such as Erich Salomon, whose candid pictures of political figures were novel in the 1930s
In Migrant Mother Dorothea Lange produced the seminal image of the Great Depression. The FSA also employed several other photojournalists to document the depression.
Soldier Tony Vaccaro is also recognized as one of the pre-eminent photographers of World War II. His images taken with the modest Argus C3 captured horrific moments in war, similar to Capa's soldier being shot. Capa himself was on Omaha beach on D-Day and captured pivotal images of the conflict on that occasion. Vaccaro is also known for having developed his own images in soldier's helmets, and using chemicals found in the ruins of a camera store in 1944.
Until the 1980s, most large newspapers were printed with turn-of-the-century “letterpress” technology using easily smudged oil-based ink, off-white, low-quality “newsprint” paper, and coarse engraving screens. While letterpresses produced legible text, the photoengraving dots that formed pictures often bled or smeared and became fuzzy and indistinct. In this way, even when newspapers used photographs well — a good crop, a respectable size — murky reproduction often left readers re-reading the caption to see what the photo was all about. The Wall Street Journal adopted stippled hedcuts in 1979 to publish portraits and avoid the limitations of letterpress printing. Not until the 1980s had a majority of newspapers switched to “offset” presses that reproduce photos with fidelity on better, whiter paper.
By contrast Life, one of America’s most popular weekly magazines from 1936 through the early 1970s, was filled with photographs reproduced beautifully on oversize 11×14-inch pages, using fine engraving screens, high-quality inks, and glossy paper. Life often published a United Press International (UPI) or Associated Press (AP) photo that had been first reproduced in newspapers, but the quality magazine version appeared to be a different photo altogether.
In large part because their pictures were clear enough to be appreciated, and because their name always appeared with their work, magazine photographers achieved near-celebrity status. Life became a standard by which the public judged photography, and many of today’s photo books celebrate “photojournalism” as if it had been the exclusive province of near-celebrity magazine photographers.
The Best of Life (1973), for example, opens with a two-page (1960) group shot of 39 justly famous Life photographers. But 300 pages later, photo credits reveal that scores of the photos among Life’s “best” were taken by anonymous UPI and AP photographers.
Thus even during the golden age, because of printing limitations and the UPI and AP syndication systems, many newspaper photographers labored in relative obscurity.
Farm Security Administration
From 1935 to 1942, the Farm Security Administration and its predecessor the Resettlement Administration were part of Franklin Roosevelt's New Deal, and were designed to address agricultural problems and rural poverty associated with the Great Depression. A special photographic section of the agency, headed by Roy Stryker, was intended merely to provide public relations for its programs, but instead produced what some consider one of the greatest collections[4] of documentary photographs ever created in the U.S. Whether this effort can be called "photojournalism" is debatable, since the FSA photographers had more time and resources to create their work than most photojournalists usually have.
Acceptance by the art world
Since the late 1970s, photojournalism and documentary photography have increasingly been accorded a place in art galleries alongside fine art photography. Luc Delahaye, VII Photo Agency and Chien-Chi Chang are among many who regularly exhibit in galleries.
Professional organizations
The Danish Union of Press Photographers (Pressefotografforbundet) was the first national organization for newspaper photographers in the world. It was founded in 1912 in Denmark by six press photographers in Copenhagen.[5] Today it has over 800 members.
The National Press Photographers Association (NPPA) was founded in 1946 in the U.S., and has about 10,000 members. Others around the world include the British Press Photographers Association (BPPA) founded in 1984, then relaunched in 2003, and now has around 450 members. Hong Kong Press Photographers Association (1989), Northern Ireland Press Photographers Association (2000), Pressfotografernas Klubb (Sweden, 1930), and PK — Pressefotografenes Klubb (Norway).[6]
News organisations and journalism schools run many different awards for photojournalists. Since 1968, Pulitzer Prizes have been awarded for the following categories of photojournalism: 'Feature Photography', 'Spot News Photography'. Other awards are World Press Photo, Best of Photojournalism, and Pictures of the Year as well as the UK based The Press Photographer's Year[7]
Ethical and legal considerations
Photojournalism works within the same ethical approaches to objectivity that are applied by other journalists. What to shoot, how to frame and how to edit are constant considerations.
Often, ethical conflicts can be mitigated or enhanced by the actions of a sub-editor or picture editor, who takes control of the images once they have been delivered to the news organization. The photojournalist often has no control as to how images are ultimately used.
The emergence of digital photography offers whole new realms of opportunity for the manipulation, reproduction, and transmission of images. It has inevitably complicated many of the ethical issues involved.
The U.S. National Press Photographers Association, and other professional organizations, maintain codes of ethics to specify approaches to these issues.[8]
Major ethical issues are often inscribed with more or less success into law. Laws regarding photography can vary significantly from nation to nation. The legal situation is further complicated when one considers that photojournalism made in one country will often be published in many other countries.
The impact of new technologies
Smaller, lighter cameras greatly enhanced the role of the photojournalist. Since the 1960s, motor drives, electronic flash, auto-focus, better lenses and other camera enhancements have made picture taking easier. New digital cameras free photojournalists from the limitation of film roll length, as thousands of images can be stored on a single microdrive or memory card.
Content remains the most important element of photojournalism, but the ability to extend deadlines with rapid gathering and editing of images has brought significant changes. As recently as 15 years ago, nearly 30 minutes were needed to scan and transmit a single color photograph from a remote location to a news office for printing. Now, equipped with a digital camera, a mobile phone and a laptop computer, a photojournalist can send a high-quality image in minutes, even seconds after an event occurs. Video phones and portable satellite links increasingly allow for the mobile transmission of images from almost any point on the earth.
There is some concern by news photographers that the profession of photojournalism as it is known today could change to such a degree that it is unrecognizable as image-capturing technology naturally progresses. There is also concern that fewer print publications are commissioning serious photojournalism on timely issues.
Minggu, 03 Agustus 2008
Digital Camera
From Wikipedia, the free encyclopedia
A digital camera is a camera that takes video or still photographs, or both, digitally by recording images on a light-sensitive sensor. Many compact digital still cameras can record sound and moving video as well as still photographs. In the Western market, digital cameras outsell their 35 mm film counterparts.[1]
Digital cameras can include features that are not found in film cameras, such as displaying an image on the camera's screen immediately after it is recorded, the capacity to take thousands of images on a single small memory device, the ability to record video with sound, the ability to edit images, and deletion of images allowing re-use of the storage they occupied.
Digital cameras are incorporated into many devices ranging from PDAs and mobile phones (called camera phones) to vehicles. The Hubble Space Telescope and other astronomical devices are essentially specialised digital cameras.
Classification
Digital cameras can be classified into several categories:
Compact digital cameras
Compact cameras are designed to be small and portable; the smallest are described as subcompacts or "ultra-compacts". Compact cameras are usually designed to be easy to use, sacrificing advanced features and picture quality for compactness and simplicity; images can usually only be stored using Lossy compression (JPEG). Most have a built-in flash usually of low power, sufficient for nearby subjects. Live preview is almost always used to frame the photo. They may have limited motion picture capability. Compacts often have macro capability, but if they have zoom capability the range is usually less than for bridge and DSLR cameras. They have a greater depth of field, allowing objects within a large range of distances from the camera to be in sharp focus. They are particularly suitable for casual and "snapshot" use.
Bridge cameras
Main article: Bridge digital camera
Bridge or SLR-like cameras are higher-end digital cameras that physically resemble DSLRs and share with them some advanced features, but share with compacts the framing of the photo using live preview and small sensor sizes.
Fujifilm FinePix S9000
Bridge cameras often have superzoom lenses which provide a very wide zoom range, typically between 10:1 and 18:1, which is attained at the cost of some distortions, including barrel and pincushion distortion, to a degree which varies with lens quality. These cameras are sometimes marketed as and confused with digital SLR cameras since the appearance is similar. Bridge cameras lack the mirror and reflex system of DSLRs, have so far been fitted with fixed (non-interchangeable) lenses (although in some cases accessory wide-angle or telephoto converters cannot be attached to the lens), can usually take movies with sound, and the scene is composed by viewing either the liquid crystal display or the electronic viewfinder (EVF). They are usually slower to operate than a true digital SLR, but they are capable of very good image quality while being more compact and lighter than DSLRs. The high-end models of this type have comparable resolutions to low and mid-range DSLRs. Many of these cameras can store images in lossless RAW format as an option to JPEG compression. The majority have a built-in flash, often a unit which flips up over the lens. The guide number tends to be between 11 and 15.
Digital single lens reflex cameras
Main article: Digital single-lens reflex cameras
Digital single-lens reflex cameras (DSLRs) are digital cameras based on film single-lens reflex cameras (SLRs), both types are characterized by the existence of a mirror and reflex system. See the main article on DSLRs for a detailed treatment of this category.
Digital rangefinders
Main article: Rangefinder camera
A rangefinder is a user-operated optical mechanism to measure subject distance once widely used on film cameras. Most digital cameras measure subject distance automatically using acoustic or electronic techniques, but it is not customary to say that they have a rangefinder. The term rangefinder alone is sometimes used to mean a rangefinder camera, that is, a film camera equipped with a rangefinder, as distinct from an SLR or a simple camera with no way to measure distance.
Information on digital rangefinder cameras specifically is here.
Professional modular digital camera systems
This category includes very high end professional equipment that can be assembled from modular components (winders, grips, lenses, etc.) to suit particular purposes. Common brands include Hasselblad and Mamiya. They were developed for medium or large format film sizes, as these captured greater detail and could be enlarged more than 35 mm.
Typically these cameras are used in studios for commercial production; being bulky and awkward to carry they are rarely used in action or nature photography. They can often be converted into either film or digital use by changing out the back part of the unit, hence the use of terms such as a "digital back" or "film back". These cameras are very expensive (up to $40,000) and are typically not used by consumers.
Line-scan camera systems
A line-scan camera is a camera device containing a line-scan image sensor chip, and a focusing mechanism. These cameras are almost solely used in industrial settings to capture an image of a constant stream of moving material. Unlike video cameras, line-scan cameras use a single array of pixel sensors, instead of a matrix of them. Data coming from the line-scan camera has a frequency, where the camera scans a line, waits, and repeats. The data coming from the line-scan camera is commonly processed by a computer, to collect the one-dimensional line data and to create a two-dimensional image. The collected two-dimensional image data is then processed by image-processing methods for industrial purposes.
Line-scan technology is capable of capturing data extremely fast, and at very high image resolutions. Usually under these conditions, resulting collected image data can quickly exceed 100MB in a fraction of a second. Line-scan-camera–based integrated systems, therefore are usually designed to streamline the camera's output in order to meet the system's objective, using computer technology which is also affordable.
Line-scan cameras intended for the parcel handling industry can integrate adaptive focusing mechanisms to scan six sides of any rectangular parcel in focus, regardless of angle, and size. The resulting 2-D captured images could contain, but are not limited to 1D and 2D barcodes, address information, and any pattern that can be processed via image processing methods. Since the images are 2-D, they are also human-readable and can be viewable on a computer screen. Advanced integrated systems include video coding and optical character recognition (OCR).
Conversion of film cameras to digital
When digital cameras became common, a question many photographers asked was whether their film cameras could be converted to digital. The answer was yes and no. For the majority of 35 mm film cameras the answer is no, the reworking and cost would be too great, especially as lenses have been evolving as well as cameras. For the most part a conversion to digital, to give enough space for the electronics and allow a liquid crystal display to preview, would require removing the back of the camera and replacing it with a custom built digital unit.
Many early professional SLR cameras, such as the NC2000 and the Kodak DCS series, were developed from 35 mm film cameras. The technology of the time, however, meant that rather than being a digital "back" the body was mounted on a large and blocky digital unit, often bigger than the camera portion itself. These were factory built cameras, however, not aftermarket conversions.
A notable exception was a device called the EFS-1, which was developed by Silicon Film from c. 1998–2001. It was intended to insert into a film camera in the place of film, giving the camera a 1.3 MP resolution and a capacity of 24 shots. Units were demonstrated, and in 2002 the company was developing the EFS-10, a 10 MP device that was more a true digital back.
A few 35 mm cameras have had digital backs made by their manufacturer, Leica being a notable example. Medium format and large format cameras (those using film stock greater than 35 mm), have a low unit production, and typical digital backs for them cost over $10,000. These cameras also tend to be highly modular, with handgrips, film backs, winders, and lenses available separately to fit various needs.
The very large sensor these backs use leads to enormous image sizes. The largest in early 2006 is the Phase One's P45 39 MP imageback, creating a single TIFF image of size up to 224.6 MB. Medium format digitals are geared more towards studio and portrait photography than their smaller DSLR counterparts, the ISO speed in particular tends to have a maximum of 400, versus 6400 for some DSLR cameras.
Kamis, 31 Juli 2008
21 Tips for Amateur Wedding Photographers
“Help me - I’m photographing my first Wedding!… Help me with some Wedding Photography Tips Please!”
It’s a question that’s been asked a few times in our forums over the last few months so while I’m not a Pro Wedding Photographer I thought it was time to share a few tips on the topic of Wedding Photography .
Wedding Photography Tips
1. Create a ‘Shot List’
Get the couple to think ahead about the shots that they’d like you to capture on the day and compile a list so that you can check them off. This is particularly helpful in the family shots. There’s nothing worse than getting the photos back and realizing you didn’t photograph the happy couple with grandma!
2. Family Photo Coordinator
I find the family photo part of the day can be quite stressful. People are going everywhere, you’re unaware of the different family dynamics at play and people are in a ‘festive spirit’ (and have often been drinking a few spirits) to the point where it can be quite chaotic. Get the couple to nominate a family member (or one for each side of the family) who can be the ‘director’ of the shoot. They can round everyone up, help get them in the shot and keep things moving so that the couple can get back to the party.
3. Scout the Location
Visit the locations of the different places that you’ll be shooting before the big day. While I’m sure most Pros don’t do this - I find it really helpful to know where we’re going, have an idea of a few positions for shots and to know how the light might come into play. On one or two weddings I even visited locations with the couples and took a few test shots (these made nice ‘engagement photos’).
4. Preparation is key
So much can go wrong on the day - so you need to be well prepared. Have a backup plan (in case of bad weather), have batteries charged, memory cards blank, think about routes and time to get to places and get an itinerary of the full day so you know what’s happening next. If you can, attend the rehearsal of the ceremony where you’ll gather a lot of great information about possible positions to shoot from, the lighting, the order of the ceremony etc
5. Set expectations with the Couple
Show them your work/style. Find out what they are wanting to achieve, how many shots they want, what key things they want to be recorded, how the shots will be used (print etc). If you’re charging them for the event, make sure you have the agreement of price in place up front.
6. Turn off the sound on your camera
Beeps during speeches, the kiss and vows don’t add to the event. Switch off sound before hand and keep it off.
7. Shoot the small details
Photograph rings, backs of dresses, shoes, flowers, table settings, menus etc - these help give the end album an extra dimension. Flick through a wedding magazine in a news stand for a little inspiration.
8. Use Two Cameras
Beg, borrow, hire or steal an extra camera for the day - set it up with a different lens. I try to shoot with one wide angle lens (great for candid shots and in tight spaces (particularly before the ceremony in the preparation stage of the day) and one longer lens (it can be handy to have something as large as 200mm if you can get your hands on one - I use a 70-200mm).
9. Consider a Second Photographer
Having a second backup photographer can be a great strategy. It means less moving around during ceremony and speeches, allows for one to capture the formal shots and the other to get candid shots. It also takes a little pressure off you being ‘the one’ to have to get every shot!
10. Be Bold but Not Obtrusive
Timidity won’t get you ‘the shot’ - sometimes you need to be bold to capture a moment. However timing is everything and thinking ahead to get in the right position for key moments are important so as not to disrupt the event. In a ceremony I try to move around at least 4-5 times but try to time this to coincide with songs, sermons or longer readings. During the formal shots be bold, know what you want and ask for it from the couple and their party. You’re driving the show at this point of the day and need to keep things moving.
11. Learn how to Use Diffused Light
The ability to bounce a flash or to diffuse it is key. You’ll find that in many churches that light is very low. If you’re allowed to use a flash (and some churches don’t allow it) think about whether bouncing the flash will work (remember if you bounce off a colored surface it will add a colored cast to the picture) or whether you might want to buy a flash diffuser to soften the light. If you can’t use a flash you’ll need to either use a fast lens at wide apertures and/or bump up the ISO. A lens with image stabilization might also help. Learn more about Using Flash Diffusers and Reflectors.
12. Shoot in RAW
I know that many readers feel that they don’t have the time for shooting in RAW (due to extra processing) but a wedding is one time that it can be particularly useful as it gives so much more flexibility to manipulate shots after taking them. Weddings can present photographers with tricky lighting which result in the need to manipulate exposure and white balance after the fact - RAW will help with this considerably.
13. Display Your Shots at the Reception
One of the great things about digital photography is the immediacy of it as a medium. One of the fun things I’ve seen more and more photographers doing recently is taking a computer to the reception, uploading shots taken earlier in the day and letting them rotate as a slideshow during the evening. This adds a fun element to the night.
14. Consider Your Backgrounds
One of the challenges of weddings is that there are often people going everywhere - including the backgrounds of your shots. Particularly with the formal shots scope out the area where they’ll be taken ahead of time looking for good backgrounds. Ideally you’ll be wanting uncluttered areas and shaded spots out of direct sunlight where there’s unlikely to be a wandering great aunt wander into the back of the shot. Read more on getting backgrounds right.
15. Don’t Discard Your ‘Mistakes’
The temptation with digital is to check images as you go and to delete those that don’t work immediately. The problem with this is that you might just be getting rid of some of the more interesting and useable images. Keep in mind that images can be cropped or manipulated later to give you some more arty/abstract looking shots that can add real interest to the end album.
16. Change Your Perspective
Get a little creative with your shots. While the majority of the images in the end album will probably be fairly ‘normal’ or formal poses - make sure you mix things up a little by taking shots from down low, up high, at wide angles etc.
17. Group Shots
One thing that I’ve done at every wedding that I’ve photographed is attempt to photograph everyone who is in attendance in the one shot. The way I’ve done this is to arrange for a place that I can get up high above everyone straight after the ceremony. This might mean getting tall ladder, using a balcony or even climbing on a roof. The beauty of getting up high is that you get everyone’s face in it and can fit a lot of people in the one shot. The key is to be able to get everyone to the place you want them to stand quickly and to be ready to get the shot without having everyone stand around for too long. I found the best way to get everyone to the spot is to get the bride and groom there and to have a couple of helpers to herd everyone in that direction. Read more on how to take Group Photos.
18. Fill Flash
When shooting outside after a ceremony or during the posed shots you’ll probably want to keep your flash attached to give a little fill in flash. I tend to dial it back a little (a stop or two) so that shots are not blown out - but particularly in backlit or midday shooting conditions where there can be a lot of shadow, fill in flash is a must. Read more about using Fill Flash.
19. Continuous Shooting Mode
Having the ability to shoot a lot of images fast is very handy on a wedding day so switch your camera to continuous shooting mode and use it. Sometimes it’s the shot you take a second after the formal or posed shot when everyone is relaxing that really captures the moment!
20. Expect the Unexpected
One more piece of advice that someone gave me on my own wedding day. ‘Things will Go Wrong - But They Can be the Best Parts of the Day’. In every wedding that I’ve participated in something tends to go wrong with the day. The best man can’t find the ring, the rain pours down just as the ceremony ends, the groom forgets to do up his fly, the flower girl decides to sit down in the middle of the aisle or the bride can’t remember her vows….
These moments can feel a little panicky at the time - but it’s these moments that can actually make a day and give the bride and groom memories. Attempt to capture them and you could end up with some fun images that sum up the day really well.
I still remember the first wedding I photographed where the bride and grooms car crashed into a Tram on the way to the park where we were going to take photos. The bride was in tears, the groom stressed out - but after we’d all calmed down people began to see some of the funny side of the moment and we even took a couple of shots before driving on to the park. They were among everyone’s favorites.
21. Have Fun
Weddings are about celebrating - they should be fun. The more fun you have as the photographer the more relaxed those you are photographing will be. Perhaps the best way to loosen people up is to smile as the photographer (warning: I always come home from photographing weddings with sore jaws and cheeks because of of my smiling strategy).
From digital Photography School
Jumat, 25 Juli 2008
Photographic
Photographic cameras
The camera or camera obscura is the image-forming device, and photographic film or a silicon electronic image sensor is the sensing medium. The respective recording medium can be the film itself, or a digital electronic or magnetic memory.
Photographers control the camera and lens to "expose" the light recording material (such as film) to the required amount of light to form a "latent image" (on film) or "raw file" (in digital cameras) which, after appropriate processing, is converted to a usable image. Modern digital cameras replace film with an electronic image sensor based on light-sensitive electronics such as charge-coupled device (CCD) or complementary metal-oxide-semiconductor (CMOS) technology. The resulting digital image is stored electronically, but can be reproduced on paper or film.
The controls usually include but are not limited to the following:
- Focus of the lens
- Aperture of the lens – adjustment of the iris, measured as f-number, which controls the amount of light entering the lens. Aperture also has an effect on focus and depth of field, namely, the smaller the opening [aperture], the less light but the greater the depth of field--that is, the greater the range within which objects appear to be sharply focused.
- Shutter speed – adjustment of the speed (often expressed either as fractions of seconds or as an angle, with mechanical shutters) of the shutter to control the amount of time during which the imaging medium is exposed to light for each exposure. Shutter speed may be used to control the amount of light striking the image plane; 'faster' shutter speeds (that is, those of shorter duration) decrease both the amount of light and the amount of image blurring from subject motion or camera motion.
- White balance – on digital cameras, electronic compensation for the color temperature associated with a given set of lighting conditions, ensuring that white light is registered as such on the imaging chip and therefore that the colors in the frame will appear natural. On mechanical, film-based cameras, this function is served by the operator's choice of film stock. In addition to using white balance to register natural coloration of the image, photographers may employ white balance to aesthetic end, for example white balancing to a blue object in order to obtain a warm color temperature.
- Metering – measurement of exposure at a midtone so that highlights and shadows are exposed according to the photographer's wishes. Many modern cameras feature this ability, though it is traditionally accomplished with the use of a separate light metering device.
- ISO speed – traditionally used to set the film speed of the selected film on film cameras, ISO speeds are employed on modern digital cameras as an indication of the system's gain from light to numerical output and to control the automatic exposure system. A correct combination of ISO speed, aperture, and shutter speed leads to an image that is neither too dark nor too light.
- Auto-focus point – on some cameras, the selection of a point in the imaging frame upon which the auto-focus system will attempt to focus. Many Single-lens reflex cameras (SLR) feature multiple auto-focus points in the viewfinder.
Many other elements of the imaging device itself may have a pronounced effect on the quality and/or aesthetic effect of a given photograph; among them are:
Focal length and type of lens (telephoto or "long" lens, macro, wide angle, fisheye, or zoom)
Filters or scrims placed between the subject and the light recording material, either in front of or behind the lens
Inherent sensitivity of the medium to light intensity and color/wavelengths.
The nature of the light recording material, for example its resolution as measured in pixels or grains of silver halide.
Controlling the photographic exposure and rendering
Camera controls are inter-related. The total amount of light reaching the film plane (the "exposure") changes with the duration of exposure, aperture of the lens, and focal length of the lens (which changes as the lens is zoomed). Changing any of these controls alters the exposure. Many cameras may be set to adjust most or all of these controls automatically. This automatic functionality is useful in many situations, and in most situations to occasional photographers.
The duration of an exposure is referred to as shutter speed, often even in cameras that don't have a physical shutter, and is typically measured in fractions of a second. Aperture is expressed by an f-number or f-stop (derived from focal ratio), which is proportional to the ratio of the focal length to the diameter of the aperture. If the f-number is decreased by a factor of , the aperture diameter is increased by the same factor, and its area is increased by a factor of 2. The f-stops that might be found on a typical lens include 2.8, 4, 5.6, 8, 11, 16, 22, 32, where going up "one stop" (using lower f-stop numbers) doubles the amount of light reaching the film, and stopping down one stop halves the amount of light.
Exposures can be achieved through various combinations of shutter speed and aperture. For example, f/8 at 8 ms (=1/125th of a second) and f/5.6 at 4 ms (=1/250th of a second) yield the same amount of light. The chosen combination has an impact on the final result. In addition to the subject or camera movement that might vary depending on the shutter speed, the aperture (and focal length of the lens) determine the depth of field, which refers to the range of distances from the lens that will be in focus. For example, using a long lens and a large aperture (f/2.8, for example), a subject's eyes might be in sharp focus, but not the tip of the nose. With a smaller aperture (f/22), or a shorter lens, both the subject's eyes and nose can be in focus. With very small apertures, such as pinholes, a wide range of distance can be brought into focus.
Image capture is only part of the image forming process. Regardless of material, some process must be employed to render the latent image captured by the camera into the final photographic work. This process consists of two steps, development, and printing.
During the printing process, modifications can be made to the print by several controls. Many of these controls are similar to controls during image capture, while some are exclusive to the printing process. Most controls have equivalent digital concepts, but some create different effects. For example, dodging and burning controls are different between digital and film processes.
Other printing modifications include:
- Chemicals and process used during film development
- Duration of exposure – equivalent to shutter speed
- Printing aperture – equivalent to aperture, but has no effect on depth of field
- Contrast
- Dodging – reduces exposure of certain print areas, resulting in lighter areas
- Burning – increases exposure of certain areas, resulting in darker areas
- Paper texture – glossy, matte, etc
- Paper type – resin-coated (RC) or fiber-based (FB)
- Paper size
- Toners – used to add warm to cool tones to black and white
Langganan:
Postingan (Atom)
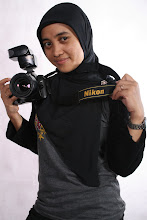

